 by
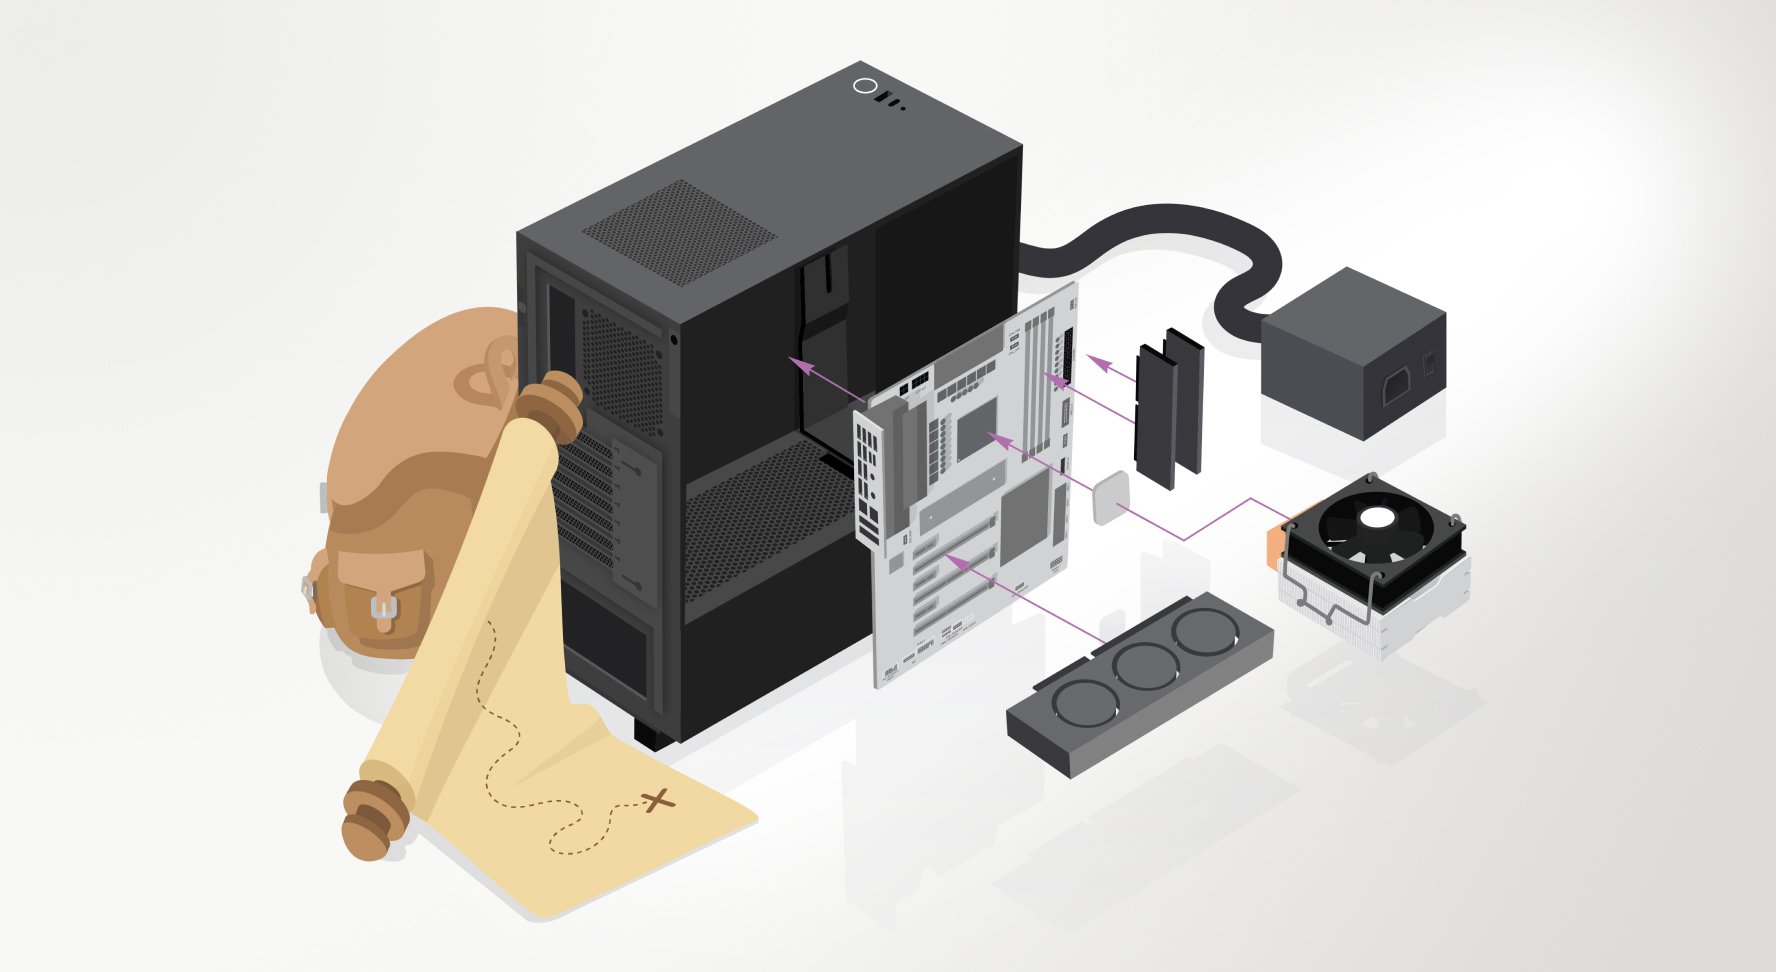
by ![Tools Needed To Build a PC [For maximum PC-Building Success]](images/tools-needed-to-build-a-pc-twitter-1200x675.jpg "Tools Needed To Build a PC [For maximum PC-Building Success]")
Wondering what tools are needed to build a PC?
I’ll be tackling this and a few related questions in the article below, as concisely as possible.
If you want your reading experience to be even more concise, you can also skip around as you please with the table of contents below.
TABLE OF CONTENTS
For those of us who don’t already know what they’re looking for, let’s dive in! Chronologically.
What Tools Are Needed To Build A PC?

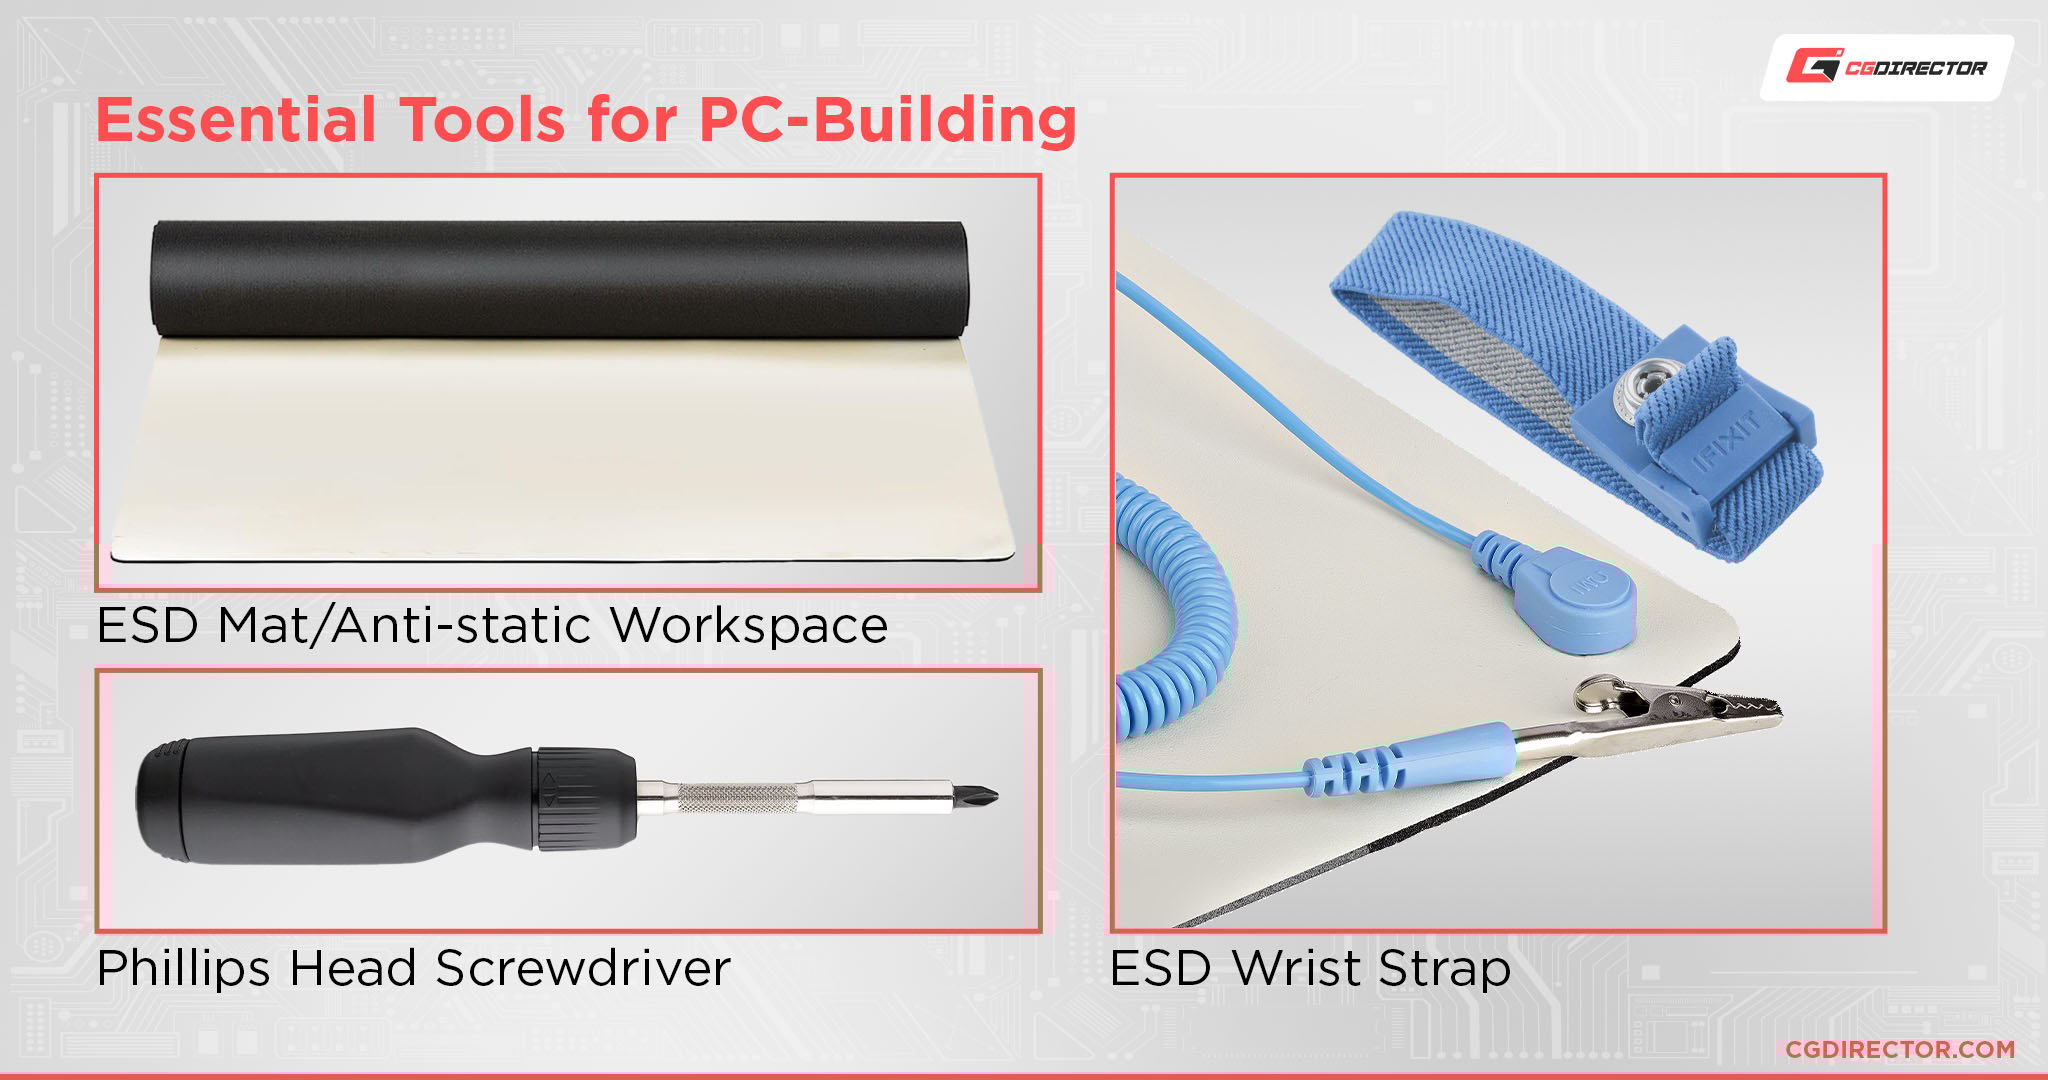
Static-Free Workspace
Before anything else, you need some kind of static-free workspace in or around your home to work with. You want to avoid carpeted surfaces, especially if at all possible since they are prone to building up static.
However, outdoor environments can be suitable if the weather is permitting, as long as you have a reasonably flat and clean surface to work with. Ideally a roof as well.
An Anti-static wrist wrap helps with keeping those delicate components shock-free and avoid breaking them before they’ve had the chance to power on at all.
Phillips Head Screwdriver
While some PC hardware may come with Phillips head tools included, it’s generally best you have a Phillips Head Screwdriver of your own for the best results.
I recommend either a cheap Phillips Head Screwdriver or an iFixit Kit if you don’t mind spending a little more for some extra electronics-tinkering versatility.
Bonus points for having one with a magnetic tip, so you can grab those screws that’ll inevitably drop into the case and hide from view.
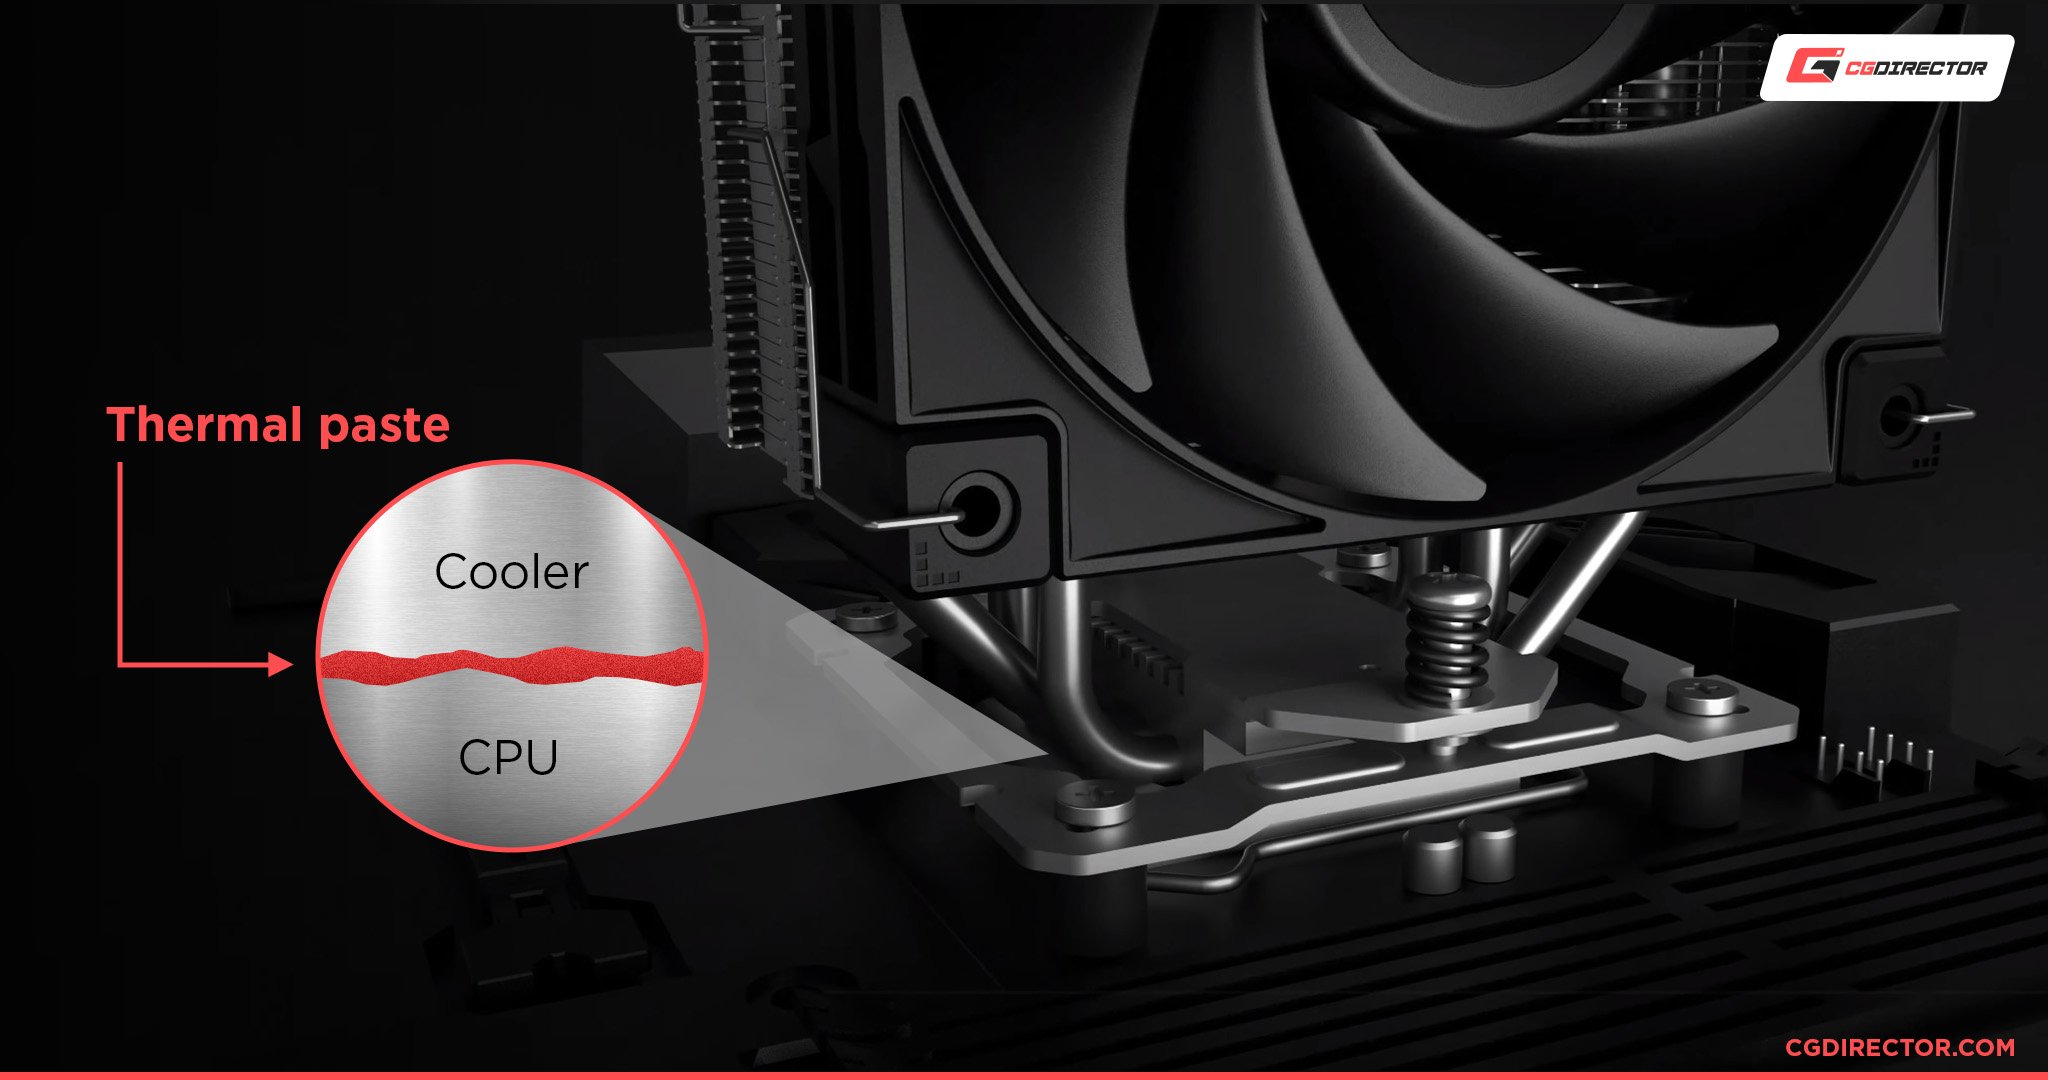
Thermal Paste If Using Non-Stock CPU Cooler
If your CPU doesn’t come with a cooler, or you’re planning on replacing the stock cooler for better performance or quieter operation, get some TIM (Thermal Interface Material). This usually means thermal paste, but an experienced builder may also experiment with other materials.
Be careful with liquid metal, though, since it can cause corrosion on some coolers and short-circuit your board applied incorrectly.
There are a fair variety of thermal paste options on the market. Even before you get into higher-end solutions like liquid metal, the thermal paste can easily be priced anywhere from under $10 to over $30 for the highest-performing stuff.
I especially recommend opting for these more expensive pastes if your cooling will be compromised in some way, for example, building in a Mini ITX case with constrained AIO/air cooler spacing.

My starting recommendations for thermal paste are:
- Value — Cooler Master CryoFuze Thermal Paste. I’ve actually used CryoFuze recently in order to replace the expired thermal paste on my SFF Noctua Air Cooler in my H210 PC build. Well, after I misplaced the intended Kryonaut paste. However, CryoFuze has served me astonishingly well for its low price point and SFF air-cooled PC usage with an i7 10700K, so I feel good about recommending it here.
- High-End — Thermal Grizzly Kryonaut Thermal Paste. Thermal Grizzly Kryonaut is currently the main high-end thermal paste recommendation on the market, and for good reason! As far as high-performance thermal compound goes, it pretty much leads the pack until you start screwing around with liquid metal and other solutions that may not be workable for all PCs or coolers.
Cooling Fans if None are Provided or Extra Budget/Space Permits
While this isn’t a tool, it’s something to keep in mind as it’ll mostly be forgotten among a regular PC components / build list.
Some PC cases will ship with few, if any, including cooling fans. Sometimes this is for the better in the long run, as otherwise, a user may end up settling for loud or subpar included fans.
However, regardless of your case’s fan situation, it’s worth evaluating your cooling configuration options for any PC build. Especially with high-performance PC builds or PCs you simply want to work well for a long time.

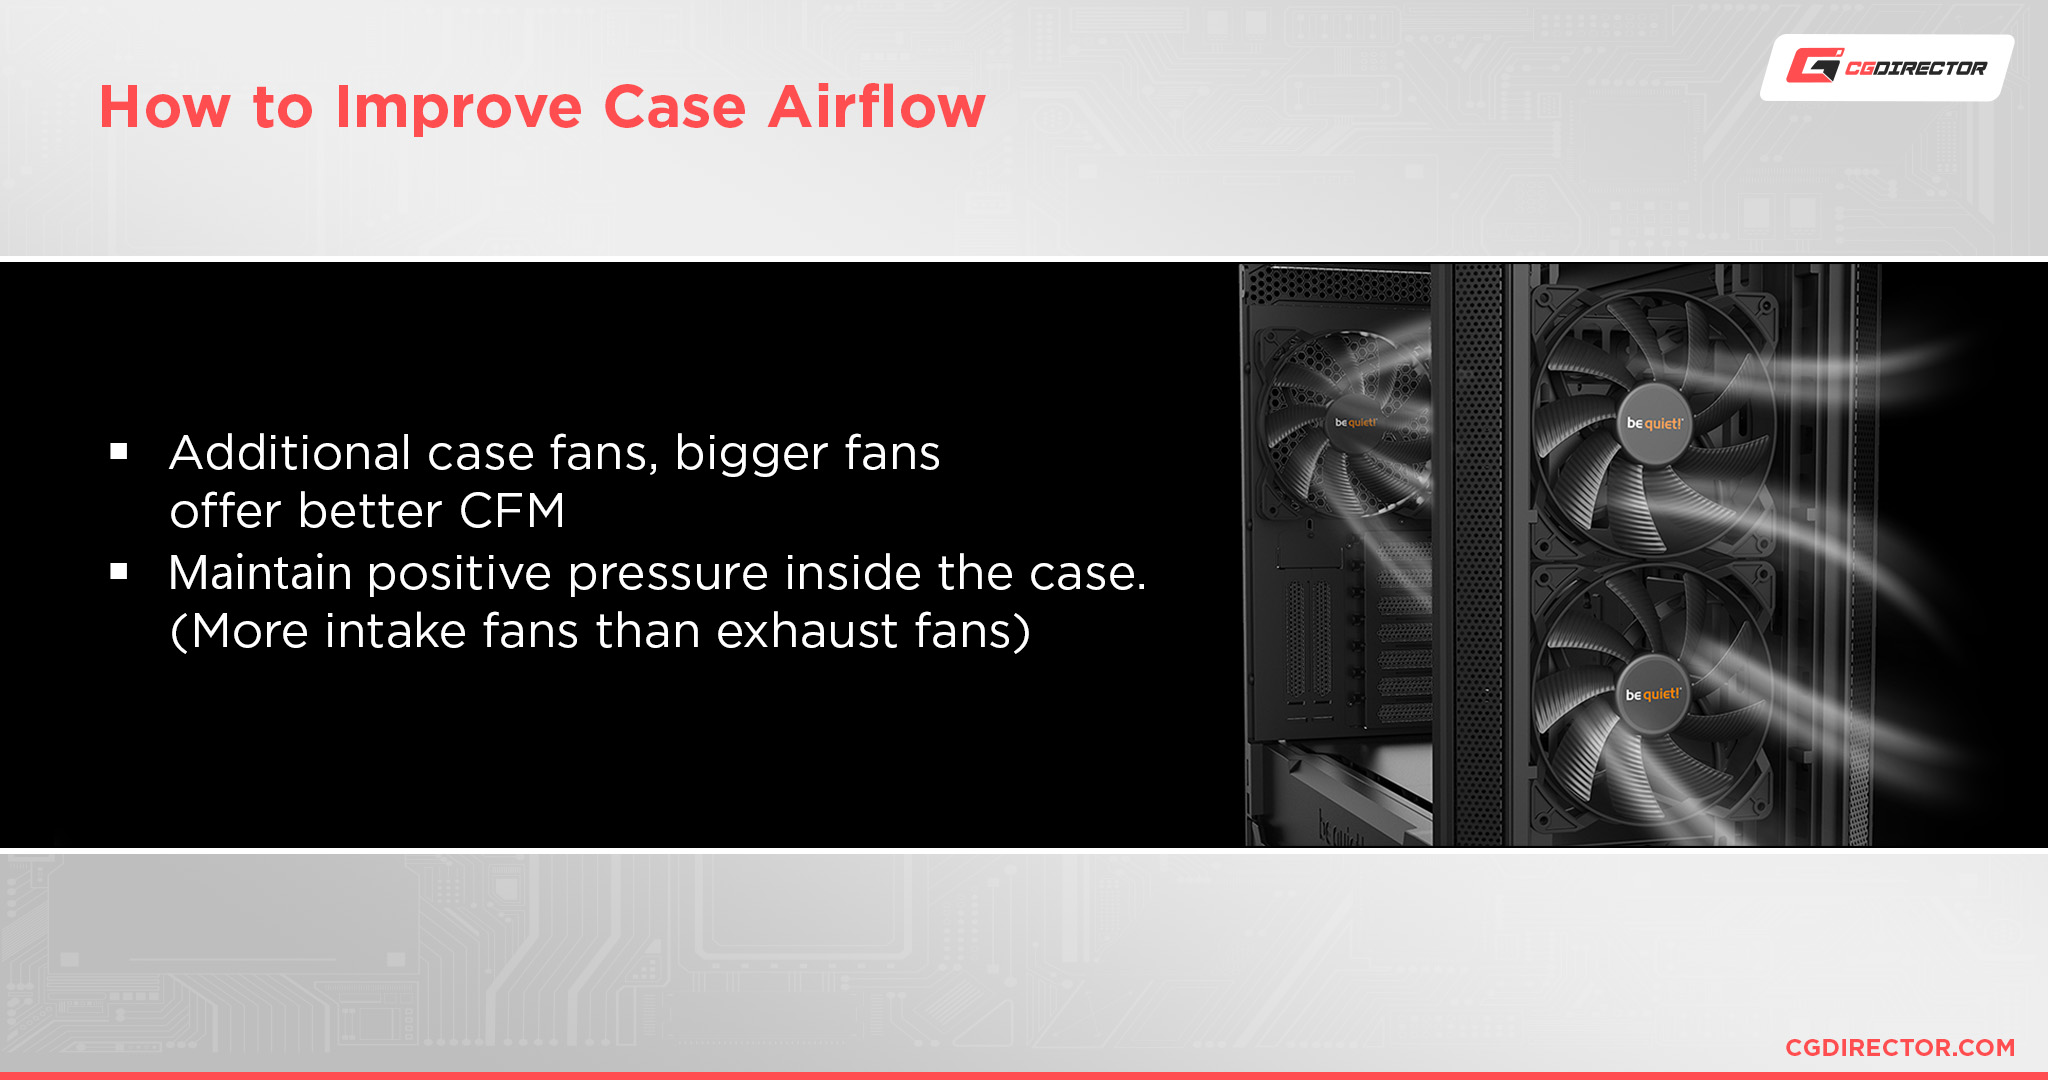
Depending on the size of your case and the fan slots inside, you’ll want to opt for 120 mm or 140 mm cooling fans.
While 120 mm fans are cheaper and may come in more varieties, 140 mm fans will generally push more air, quieter, and are thus preferred if your case can support them.
Zip Ties for Cable Management
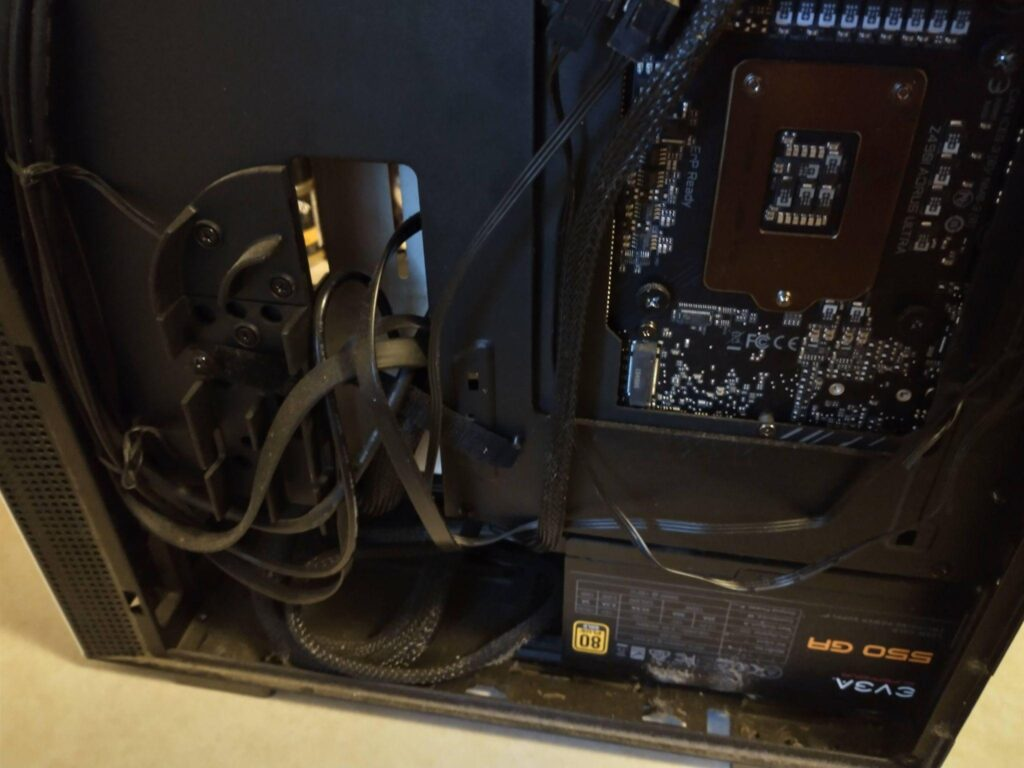

Even if your case has dedicated cable management spacing like mine pictured above, using zip ties can help keep your cables looking much more clean and orderly than this.
Plus if you don’t have cable management space in your chassis, especially for more specialized builds, using zip ties can help stabilize and route cables in ways that would otherwise not be possible.
Even if you don’t end up getting zip ties, try to be conscious of your cable management when you’re assembling your PC build.
Make sure of any compartments or cable management holes your motherboard does have to offer, and be sure to route cables in a manner that makes them easy to (re)move whenever you need to open up your PC in the future.
Patience
If you haven’t built a PC before, or even if you have, you may be surprised at the patience required in parts of the process.
It’s important not to get too frantic or sweaty while getting your PC assembled since you don’t want any bodily fluids interfacing with your electronics.
Static is unlikely to one-shot any particular component of your PC, but it’s still best to avoid it by regularly grounding yourself whenever possible. An anti-static wristband can also help with this.
Never be afraid to take a break, consult a manual, or check tutorials at any step during your PC building process.
As long as you have a safe workspace for your machine, you don’t need to stress too hard until it’s finished. Think of it as building a little friend or companion with caution rather than defusing a bomb with terror.
Foresight (or, The Instruction Manuals)
Finally, never forget your most important tool when you’re building your PC. Foresight!

Usually in the form of specific instruction manuals for your motherboard and chassis, but you may also want to consult a PC Building Tutorial or two in order to stay on task with clarity.
The foresight of picking all the right components that will also be compatible is another foresight often overlooked. Use a PC-Builder tool such as this or go to PCPartPicker to make sure everything you’re grabbing will work well together.
Are all of these tools really necessary?
Save for the thermal paste if you don’t have any, and the screwdriver, none of the above is strictly necessary to build a PC. But it’s all about reducing risk of failure, and after building PCs for years and years, I know how disappointing and frustrating it is having to RMA a part or troubleshoot build failures.
After all, a PC isn’t cheap, and the tools above don’t increase the necessary budget all that much, but they’ll make sure everything goes as planned.
FAQ
How Hard Is It To Build a PC?
Truthfully, not that difficult!
Once you’ve covered the requirements listed above and have a decent guide or two to work with, you shouldn’t have much difficulty building a PC.
As long as your hand-eye coordination is up to par and you don’t have any health conditions that may make it difficult to assemble your PC, it’s more a matter of knowledge and patience than pure difficulty.
What Mistakes Should Be Avoided In a PC Build?
Ah, PC-building mistakes. We all make them, especially if we’re just getting started.
If you want an experienced PC builder’s idea of the top PC building mistakes to avoid, be sure to check out my extended guide on the topic!
To summarize and keep the rest of this article in mind, though, I’d narrow down your primary concerns to the following:
- Build Creation Mistakes (Non-Modular PSU, Incompatible Hardware, etc.)
- Build Assembly Mistakes (Not following the manuals or installing in the wrong order.)
- Minor Errors (Non-critical alignment mistakes, fans in wrong directions, cables unplugged, etc.)
How Much Does It Usually Cost To Get a PC Built?
If you’re buying a prebuilt PC, this is going to depend greatly on the specific provider and will also scale to what they’re paying for the hardware.
If you’re getting your own PC parts assembled, this will still depend on the person you pay, but an experienced PC builder should take about 3-4 hours or less unless it’s particularly specialized.
So, if a rate isn’t offered or listed anywhere by your local repair shop, starting there can be a good idea.
If you’re particularly lucky, you may even have a friend who can help build your PC for you. This is fine and dandy, but be sure to at least treat them to a nice dinner or something after. No techie friend ever wants to feel taken for granted.
What To Do After Your PC Is Built?
After you’ve built your PC, it’s time to run it through its paces and get everything up-to-date and running before you start installing games or doing major projects on it.
That’s a bit out of the scale of this article, but Alex wrote an excellent checklist guide on this topic that I’d recommend getting started with! If nothing else, I’d at least recommend using Nanite or something to get all your apps after setting up the PC.
A Note on Building Mini ITX PCs
Speaking as a user of one myself, it’s worth noting that there are many great reasons to build a Mini ITX PC. They are not, however, known for being easy to build in.
A smaller case is nice for aesthetics and transportation but can extend the time and patience needed to assemble a PC considerably.
There are also more compatibility concerns, but you can iron those out when assembling the part list.
Over to You
And that’s it!
I hope this article helped you find the tools you needed for your next PC building project, and gave you some nice pointers to additional information if it’s needed to smooth that building process.
If you still have questions related to PC building or other hardware topics, feel free to ask them in the comments below, where me and other members of the CGDirector Team will be delighted to assist you!
Alternatively, you can also hang out in the Forums with the rest of the team and community for a more social setting.
Until then or until next time, happy building! And don’t forget to clean off your work surface before you start building anything on it, especially a PC.
![The Best Custom PC Builder Websites [Ranked]](images/the-best-custom-pc-builder-websites-twitter-594x335.jpg "The Best Custom PC Builder Websites [Ranked]")
![The Best Custom PC Builder Websites [Ranked]](https://www.cgdirector.com/wp-content/uploads/media/2022/11/The-Best-Custom-PC-Builder-Websites-Twitter-594x335.jpg "The Best Custom PC Builder Websites [Ranked]")


![How To Know If All Your PC-Parts Are Compatible? [4 Fast Options]](images/how-to-know-if-all-your-pc-parts-are-compatible-twitter-594x335.jpg "How To Know If All Your PC-Parts Are Compatible? [4 Fast Options]")
![How To Know If All Your PC-Parts Are Compatible? [4 Fast Options]](https://www.cgdirector.com/wp-content/uploads/media/2022/08/How-to-Know-if-All-Your-PC-Parts-Are-Compatible-Twitter-594x335.jpg "How To Know If All Your PC-Parts Are Compatible? [4 Fast Options]")
0 Comments